Many users who are a little low on the technical level or are nowhere near it usually ask how to backup Office 365 mail. It is easy to use Microsoft 365 but it becomes a task for users who are not in the technical arena.
For these users, we are here with a simple technique that doesn’t need any technical expertise & can backup all the data in a single go.
This is the Office 365 Mail Backup Tool Recommended by Professionals who have been in the backup ring for quite some time now.
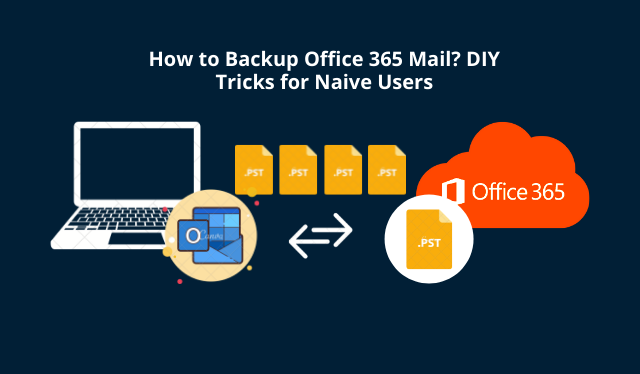
Here are the simple steps to Backup Office 365 Mail:
- Step 1. Run the tool to backup Office 365 email free.
- Step 2. Set the Source & Destination & select categories.
- Step 3. Enter details for both Source & Target accounts.
- Step 4. Insert the User IDs for mapping.
- Step 5. Validate both accounts & hit Start Backup.
The reasons for taking backup are simple including the hacking of accounts, accidental deletion of data, malware attacks such as ransomware, virus intrusion, etc.
It is always a wise choice to take backup of data even if you are not going through any of these troubles.
Let’s find out about the methods that can help you perform the export.
How Many Methods Are There to Learn How to Backup Office 365 Mail?
The method we are talking about in the above section is a technique best for non-technical users. It will export all the required data without creating a mess or any hassle.
Another method which you can work with is a bit difficult and requires technical expertise. If you have been through such processes before, you might be able to understand the eDiscovery Content Search method.
We will be explaining both these methods in detail for better clarification. You can check out both the methods and weigh out their advantages & drawbacks.
Starting Now!
Backup Office 365 Email Free Using the eDiscovery Content Search Tool
This method is not the solution to back up the data but to export an Outlook-supported file format containing all the data.
But before that, there are certain pre-requisites you need to follow:
- You need to have Windows OS 7 or above to use this tool.
- It is mandatory that you have Microsoft .Net framework.
- Make sure the latest Internet Explorer or any other browser is available to download the tool.
After that, follow these steps:
- Sign in to your Office 365 account & go to the Admin Center to start learning how to backup Office 365 mail.
- Click on the Security & Compliance
- Choose the Permissions option from the extended list & click on the eDiscovery Manager
- Go to the Edit Role Group section to add the important roles if not already present.
- After doing so, click on Security & Compliance & choose Content Search
- In the new window that appears, choose the New Search
- Add Conditions to filter the emails you want to transfer.
- Select the emails or mailboxes to backup Office 365 emails free from the Choose Users, Group
- Then, click on the Save & Run button to move forward.
- Enter the name for your search in the Saved Search section & hit Save.
- Next, the tool will start the search in the background after saving it.
- Now, click on the More option & choose the Export Results option from the menu.
- Hit the Export button in the Export Results
- Move to the Export tab to view the list.
- Press the Download Results option to save the data for how to backup Office 365 mail process & copy the Export Key from the same window.
- Paste this key in the Paste Key field & hit the Start button to begin the procedure.
After the procedure is completed, you can view the data using the Outlook desktop application. If there are no errors, you will easily be able to find all your files.
Are There Any Limitations of the eDiscovery Tool?
Yes, the following list consists of a few:
- This method has a complex procedure to backup Office 365 emails free which you might get confused applying.
- There are a lot of steps that need to be followed correctly because if even a single step is skipped, the procedure can cause various errors.
- Speaking of errors, it becomes hard to overcome these issues which sometimes leads to loss of data.
- The operation is a time-sucking & lengthy procedure due to the complications involved.
- Not a suitable solution for novice users as there is a requirement of a high level of technical expertise.
How to Backup Office 365 Mail in a Painless Motion?
Using the software that we have discussed in the beginning can the user get a secure & successful backup.
The procedure is simple & doesn’t require any technicalities on the user’s end.
Follow these steps for a safe backup:
- Run & Install the utility on your Windows OS machine & go to the Setup tab where the Source should be Office 365 & the Target should be Outlook.

- After that, choose the categories you want to export data from in the Workload Selection Mark the Date-filter option to set the dates to backup Office 365 emails free from a specific time period.

- Then, in the Source window, provide the admin credentials for Office 365 account & hit Validate. Click on Next.

- In the next step, set the Destination & File Size for the Outlook file & Validate the account. Press the Next

- To start the mapping of User IDs, insert the IDs by using either the Fetch Users option to the Import Users

- The final step is to set the priorities if the need be. Validate the accounts & click on the Start Backup

In Short
Users asking how to backup Office 365 mail are clueless of which solutions are technically inclined & which are free of it. This article is a way of showing them how they can perform the procedure in both a simple & complex manner.
Due to the reasons for backup, it is a suggestion that the software is used for downloading the data on the local storage. It keeps the data away from all the external threats and provides a successful transfer.